
You can replace a thermal fuse in a dryer yourself in about 15 to 30 minutes using basic hand tools. This small safety device shuts the dryer down when it overheats, and once it blows, it cannot be reset. Swapping it out is one of the most common and straightforward dryer repairs a homeowner can do. This guide shows you how to replace a thermal fuse in a dryer safely, from testing the old part to installing the new one and fixing the root cause so the problem does not return.
To replace a thermal fuse in a dryer, unplug the unit, remove the back panel, disconnect the wires from the blown fuse, unscrew it from the blower housing, mount the new fuse in its place, reattach the wires, and reassemble the panel. Always clean the exhaust vent before running the dryer again.
What Is a Thermal Fuse and Why Does It Blow
A thermal fuse is a one-time-use safety device found in nearly every dryer built since the 1980s. It sits on the blower housing or near the exhaust duct and monitors the air temperature leaving the drum. When the internal temperature climbs above a safe limit, this component cuts the electrical circuit and stops the dryer from running.
Once the fuse blows, it stays open permanently. You cannot reset it. Replacement with the correct part for your specific model is the only fix.
Restricted airflow is the most common reason the fuse blows. Lint buildup inside the exhaust vent or a clogged lint screen traps heat until the temperature spikes. A faulty heating element that fails to cycle off or a kinked vent hose can also push the temperature past the safe range. According to an NFPA fact sheet published by the U.S. Department of Energy, failure to clean was the leading cause of home dryer fires, which is the same root cause behind most blown fuses.
One detail most guides skip is the difference between electric and gas dryers. When the fuse blows in an electric dryer, the unit usually will not run at all, even though the control panel lights may still work. In a gas model, the drum often keeps spinning, but the burner will not ignite and the dryer produces no heat.
Signs Your Dryer Has a Blown Fuse
A blown fuse gives you clear signals. Your dryer will not start even though the control panel has power. In other cases the drum spins but the air stays cold, leaving clothes damp after a full cycle. Sometimes the dryer starts, then shuts off mid cycle and refuses to restart.
These symptoms can overlap with other issues like a tripped circuit breaker or a faulty door switch. That is why testing the part with a multimeter before swapping it out saves both time and money.
How to Test the Fuse With a Multimeter
Testing takes about 30 seconds once you remove the fuse from the dryer. Set your digital multimeter to the continuity setting or the lowest ohms of resistance setting. Touch one probe to each terminal.
A working fuse will read close to zero ohms, and the meter will beep on continuity mode. That means the circuit is closed and the part is still good. A blown fuse will show “OL,” “1,” or no movement at all, meaning the circuit is open. If the part tests good, the problem lies elsewhere, possibly in the thermostat, heating element, or wiring.
Tools You Need for the Replacement
Gather these before you begin: a quarter inch nut driver, a Phillips or flathead screwdriver, needle nose pliers, work gloves, and the replacement fuse that matches your dryer model number. A vacuum cleaner or shop vac and a vent cleaning brush are also needed to clear lint from the exhaust system after the repair.
How to Replace a Thermal Fuse in a Dryer Step by Step
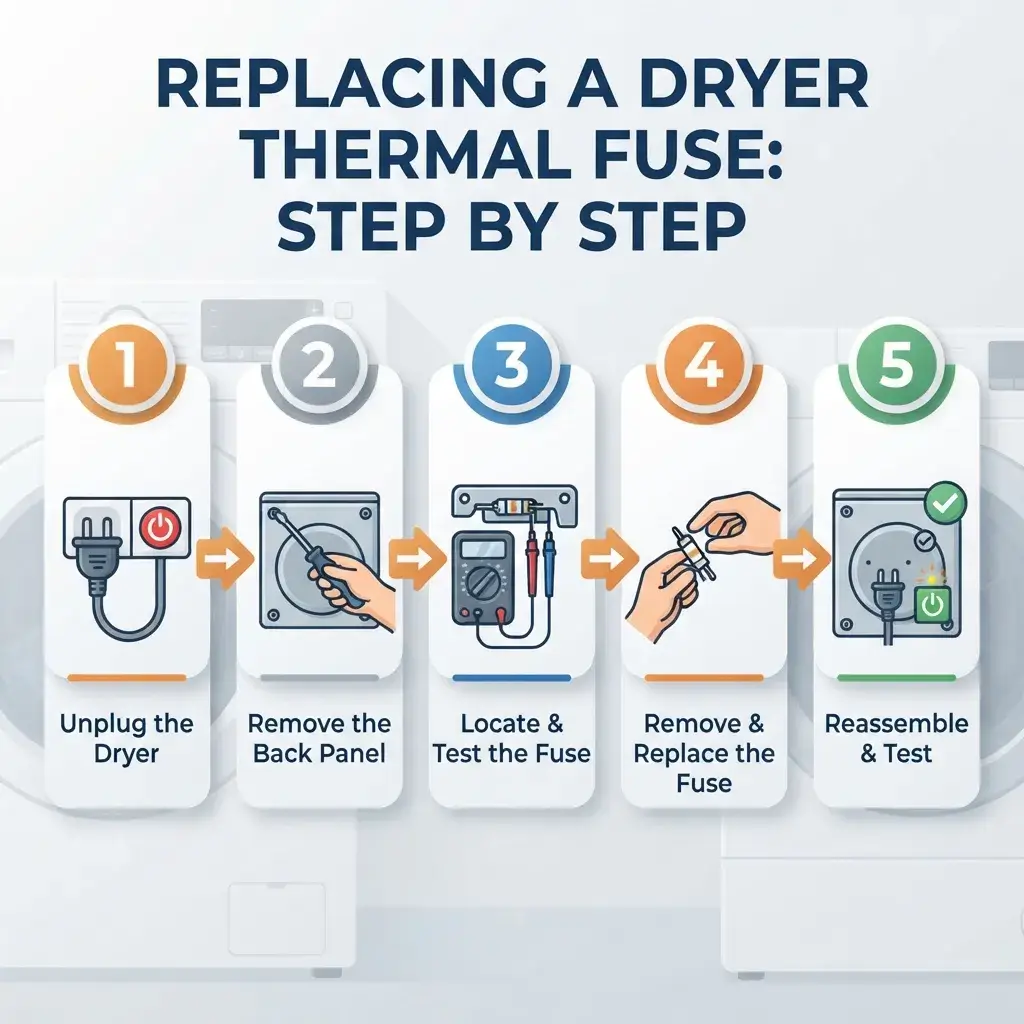
Follow these steps in order. The whole job takes 15 to 30 minutes on most models.
Disconnect Power
Safety comes first. Unplug the dryer power cord from the wall outlet. Electric dryers run on 220 volts, which is double the standard household current and can cause serious injury. For a gas dryer, also shut off the gas supply valve before you begin. Put on work gloves to protect your hands from sharp panel edges.
Remove the Back Panel
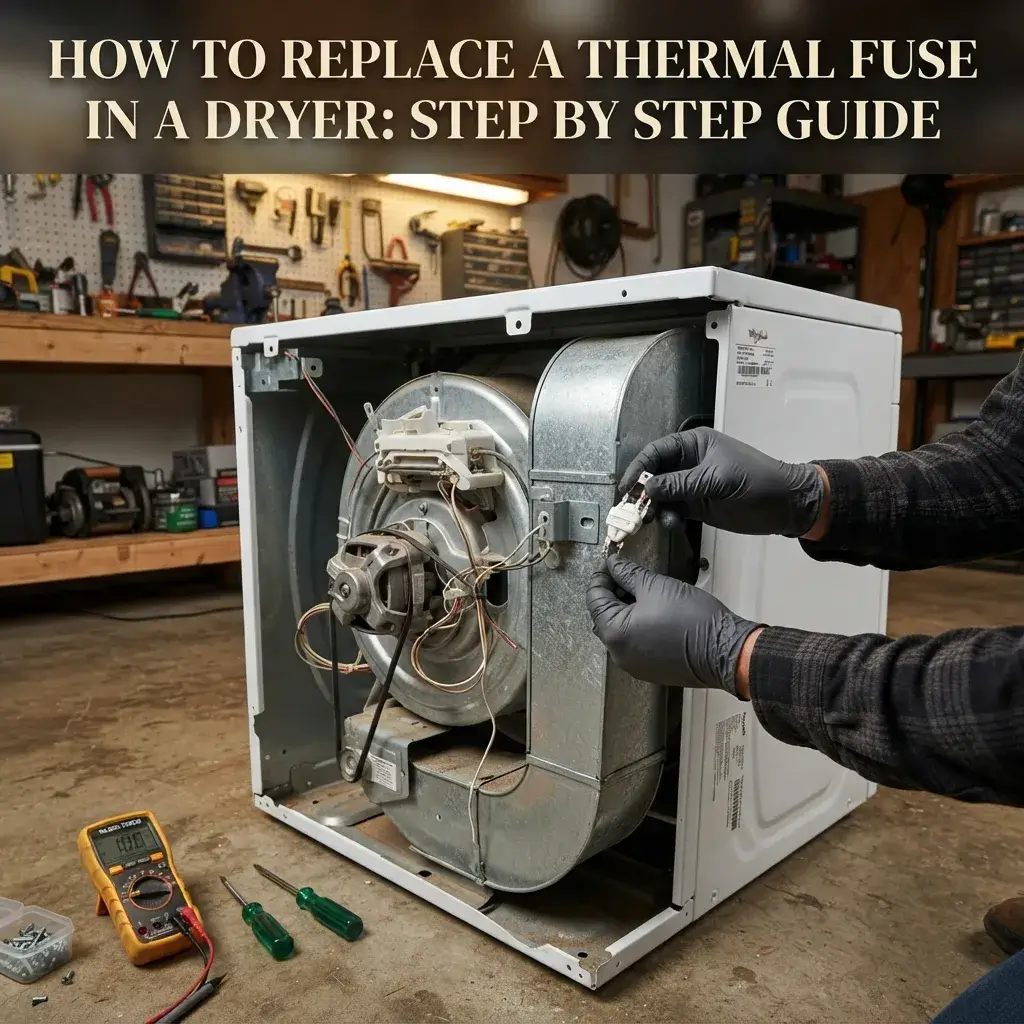
Pull the dryer away from the wall so you can reach the back. Use the nut driver to remove the screws around the perimeter of the back panel. Lift the panel off and set it aside. While the back is open, use your vacuum to clean any lint and dust from inside the dryer cabinet. Clearing this debris now improves airflow and helps prevent future overheating.
Remove the Blown Fuse
Locate the fuse on the blower housing or near the exhaust duct. It is a small, flat piece, usually white or silver, with two wire terminals. Grasp each wire connector firmly and pull it straight off the terminal. Never pull on the wire itself, as that can damage the connector. Then remove the mounting screw with the nut driver and take the part out. Tip: snap a photo of the wire positions before disconnecting so you can match them on the new one.
Install the New Fuse
Place the new part in the same position where the old one sat. Secure it with the mounting screw and tighten snugly. Push each wire connector onto the matching terminal until it clicks firmly into place. Wire order usually does not matter, but check your owner manual to confirm for your specific model.
Reassemble and Test
Set the back panel into position and replace all the screws. Plug the power cord back into the outlet. If you have a gas dryer, reopen the gas supply valve. Run a short test cycle and confirm that the dryer heats and operates normally. Listen for smooth airflow and make sure the exhaust vent outside your home pushes warm air when the dryer runs.
Fix the Root Cause Before You Run Full Loads
Replacing the fuse without fixing the overheating problem is a temporary patch. The new part will blow again the next time the dryer gets too hot. Before you run a full load, take care of these steps.
Clean the lint screen and the slot it sits in. Disconnect the flexible vent hose from the back of the dryer and clear it of lint using a vent cleaning brush. Check the exterior vent flap outside your home and remove any lint, debris, or nests blocking the opening. Make sure the vent hose is not kinked or crushed against the wall. If the fuse keeps blowing after cleaning, the heating element or the high limit thermostat may be faulty and should be inspected by a qualified technician.
Never Bypass a Blown Fuse
Some online sources suggest bypassing the safety device by connecting its two wires together. Do not do this under any circumstances. The fuse exists to cut power before the dryer reaches temperatures that ignite lint and start a fire. Bypassing it removes the only safeguard standing between a clogged vent and a house fire. Always install the correct replacement part and fix the root cause of the overheating.
Frequently Asked Questions
How do I know if my dryer thermal fuse is blown?
Your dryer will either refuse to start or run without producing heat. Test the fuse with a multimeter set to continuity. If the meter shows no reading or displays “OL,” the part is blown and needs to be replaced.
Can I reset a thermal fuse instead of replacing it?
No. This is a one time use device. Once it blows, the internal element breaks permanently. You must install a new one before the dryer will work again.
Where is the thermal fuse on a dryer?
Most dryers have it mounted on the blower housing or near the exhaust duct at the back of the machine. Some front load models place it behind the lower front panel. Check your owner manual or the parts diagram for the exact location on your model.
How long does it take to replace a dryer thermal fuse?
The job takes 15 to 30 minutes for most models. You only need a nut driver, a screwdriver, and needle nose pliers to complete the work.
Will cleaning dryer vents prevent future fuse failures?
Yes. Clogged vents are the number one cause of fuse failure in dryers. Clean the lint screen after every load, and inspect and clean the full exhaust vent system at least once a year. Keeping clear airflow stops the dryer from overheating and protects the fuse from blowing again. If the problem keeps coming back despite regular cleaning, our appliance repair team can take a closer look and rule out a deeper electrical issue.